
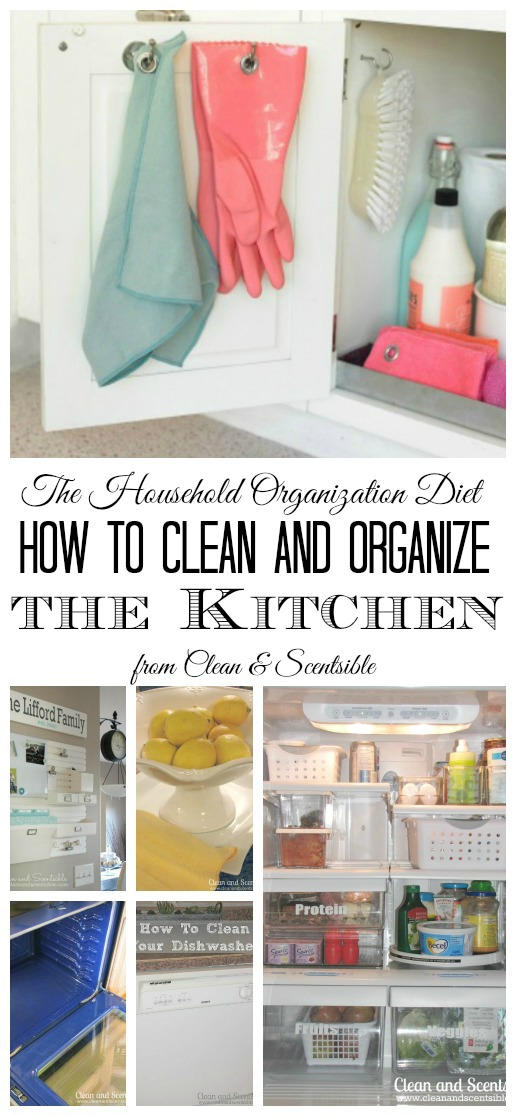
How to Organize Kitchen Cabinets
For most households, the kitchen is one of the busiest rooms in the whole house. With all of the traffic and multi-users, it can be a difficult space to keep organized. With a good organization system in place, however, it is possible to get and keep your kitchen organized. {If you think that I’ve always had organized cupboards, check out these before photos from when I first started my organization journey. Yikes!}
Here’s my step by step plan to help you organize your kitchen cabinets. Remember that it will take a little time and some trial and error before you have it set up just the way you’d like. Once you have it all organized, however, it should be relatively easy to maintain and will be well worth your effort!
This post contains affiliate links. This means that I may make a small commission from items purchased directly through these links at no cost to you. Thank-you for your support!
Come up with your strategy.
There are basically two ways that you can work on organizing the cabinets. The first option is to just jump right in there and do it all at once. This works best if you have a smaller kitchen, plan on doing a lot of cabinet reshuffling {i.e. rearranging items between cabinets}, or really need to do a lot of decluttering. Depending on the current state of your cabinets and how many you have to organize, this could take anywhere from a couple of hours to a full day {or more!}. Be patient with yourself – things WILL get worse before they look better. lol!
The second option is to work on a few cabinets at a time. This works best if you don’t plan on doing a lot of shuffling items around, are just going to swapping items between two cabinets, or tend to get overwhelmed easily with organizing. Since I now have my cupboards set up the way I like them, this is usually the method that I use. if you have a large kitchen but would like to switch up your storage spaces, you could also do a hybrid model of the two, and divide the kitchen up into half. They key is to not make things too overwhelming for yourself.
Declutter, declutter, declutter!
I can’t say this enough, but it’s SO important to declutter any space before organizing it. First of all, a good decluttering lets you know what you actually have deep within those cupboards. Secondly, your cupboards will be so much easer to keep organized and clean when you have less stuff. {It’s kind of ironic, but I also find that I use my items more when I have less.} And lastly, there is no point wasting your time and energy organizing and maintaining items that you don’t really love or need. For help with the decluttering process, check out this post on how to declutter any space and this post with 20 items to declutter from the kitchen.
The first step with decluttering is to always completely empty out the space. Now I know that it can sometimes be hard to get rid of things, but you really do need to be ruthless when you purge. Obviously, anything that is broken or you no longer love or use needs to go. As a rough rule of thumb, donate or sell non-seasonal items that have not been used in the past 6 months or seasonal items that were not used during the past season. For items that you use only once or twice per year, think if you could just borrow a similar one from a friend or family member rather than keep it around your own home.
If you’re not sure if you should keep it or not, set the item aside until the very end and see if there is even space left. For me, seeing how nice my organized cupboards look is enough motivation to part with those so-so items that are left.
Do a thorough cleaning.
Once you have everything emptied out of your cabinets, make sure you do a good cleaning of the space. Be sure to clean all surfaces of the cupboards {including sides and top} and get right into those corners
- vacuum up crumbs and loose particles with a hand held vacuum
- wipe the cupboards down with multi-purpose spray and a microfiber cloth. For extra greasy areas, you can use a bowl of warm water mixed with a few drops of dish soap.
- If you have any concerns with food spills, you can then use some disinfecting spray and then wipe down to remove residue.
- For pots and pan scuff marks, make a paste of baking soda and water to scrub or use another abrasive cleaner.
Line your cupboards and drawers.
This is totally optional, but lining your drawers can provide a few extra benefits. Firstly, if your cupboard or drawer bottoms have seen better days, liners will cover up any stains or chips. I used a simple white liner for our kitchen, but you can also find many colorful or patterned options or make your own from wrapping paper and clear contact paper. Secondly, if you want to protect your surfaces from any damage or spills in the future, the liner provides an extra barrier of protection. I didn’t line all of my cupboards and drawers but did end up doing most of them.
For most projects, I do recommend choosing a non-adhesive liner as it can be removed for washing when needed and won’t be difficult to switch out if you change your mind in the future. If you need to secure the edges you can always use a bit of double sided tape or small Command strips so it doesn’t slide.
Organize by zones.
Organizing by zones means that you try to group all similar items together and closest to the area that you will be using them. If you’re just starting out organizing this way, it may mean moving some of your kitchen storage around from cabinets that you currently use. Depending on your kitchen layout and cupboard storage options, you may have to make a few exceptions, but this is generally the most functional way to organize the space.
The first step to organize kitchen cabinets by zone is to take a few minutes to think about where you want to store your items and how you want your kitchen to function. Here are some ideas for zones that you may want to think about…
- cooking/baking zones
- food prep zone
- food storage zone
- storage container zone {dishes, glasses, silverware, food storage, etc.}
- cleaning product zone {usually around and under the kitchen sink}
- coffee, tea or other beverage bar
Depending on your needs, you can come up with other zones that make your space more functional. For example, we have a little smoothie/health bar in one corner of our kitchen for our blender, kettle, teas, vitamins, smoothie ingredients, etc. It contains everything we would need in that one small area so we can get things done quicker and easier.
Make things accessible.
Kitchen cabinet space is generally at a premium, so you want to make the best use of the space and make items as easy to access as possible. Store frequently used items in easy to reach locations at the front of cabinets or in canisters on the counter. Save the back of the cupboard space or higher shelves for items that you use less frequently. And don’t forget about using the inside of your cupboard doors for extra storage!
If you’re short on kitchen space, infrequently used or seasonal items can even be stored outside of the kitchen in another area that has a little more storage space. Keep kids items at a level that they can access them so you’re not always having to help them out.
To make things easy to grab {and to put away!}, I try to make sure that everything in the cupboard can be removed {and put back!} by removing only one other item {or block of items} at most. If you have to take out 4 or 5 items stacked on top of each other to get what you want, chances are that you’re either not going to use it or that it will not get put back properly. These drop down storage racks work great for storing items on higher shelves. They pull down easily and are perfect for spices, canned goods, breakfast condiments {like peanut butter, jam, and honey}, etc. A double lazy susan also works great for optimizing the vertical storage space.
Use those awkward spaces.
Every kitchen seems to have at least a couple of awkward cupboards or poorly designed storage spaces. Get creative! Think of different items that might work better to store there or find bins or other organizers to make the space more functional. We had a super tall and narrow cupboard that really didn’t fit anything, so we added a few shelves and turned it into our cleaning cupboard.
Declutter your counter.
Kitchen cupboard organization and decluttering your counters goes hand in hand. Keep out your most used items and try to find storage for other less used objects. Find pretty containers, tray, or baskets to corral those items that you keep on the counter. It will make your counters much quicker and easier to clean and provide you with more work space {as well as make your kitchen seem instantly cleaner!} You also want to try to keep your counter storage limited to the back 1/3rd of the counter, so there is still plenty of space for prep work. For more tips on decluttering kitchen counters, check out this post on how to keep your counters clutter-free!
Whew! I hope this gives you lots of kitchen cabinet organization ideas! If it seems like a lot, remember that you can just work on one cabinet at a time. Once you have your system down, it gets a lot quicker and easier.
Happy organizing! Let me know if you have any questions!
More Home Organization Ideas
For more home organization projects and ideas, check out these posts…
Bathroom Cabinet Organizer Ideas
The post How to Organize Kitchen Cabinets appeared first on Clean and Scentsible.
source https://www.cleanandscentsible.com/organize-kitchen-cabinets/
No comments:
Post a Comment